Soccer exercises for u17
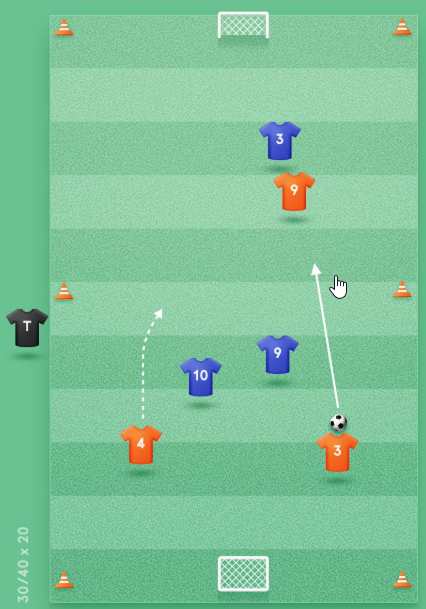
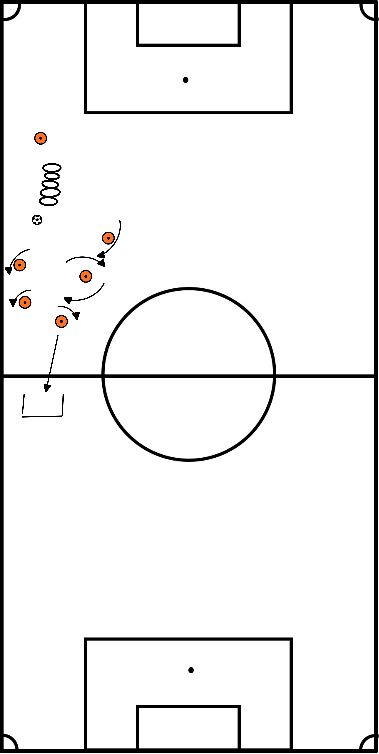
- Both teams can score on a small goal
- When the ball is out, dribble in
- Dribble in at a back ball or corner kick
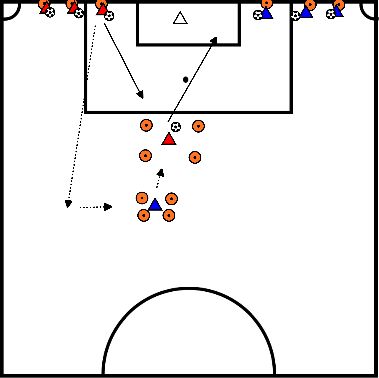
- 2 groups
- Both groups are on one side next to the goal.
- 1 player plays the ball high/low (depending on level), to player 2 who is in a square at the edge of the penalty area.
- Player 2 must check the ball in square and shoot.
- Retrieves his own ball and connects at the row next to the goal. Player of the other team was waiting behind square, now moves up.
- Must be done at high speed, otherwise it will be too static.
- The team with the most goals wins.
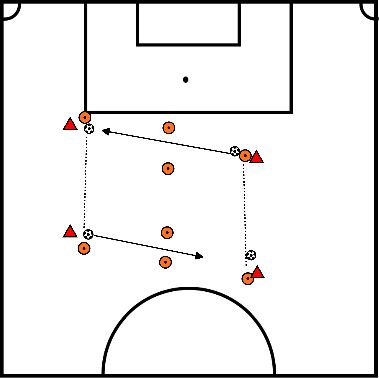
- Player 1 and Player 2 start dribbling at the same time.
- At the end they pass through pawns to the other side.
- The next player receives the ball and starts dribbling.
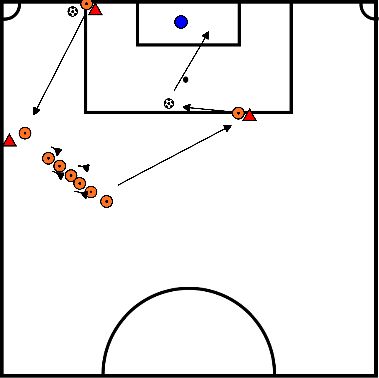
- Player 1 passes the ball to player 2.
- Player 2 dribbles along the pylons, passes at the end to player 3.
- Player 3 bounces the ball back to player 2, player 2 finishes.
- Player 3 fetches the ball,
- Runs over to stand on the spot of Player 1
- Player 1 to Player 2,
- Player 2 to Player 3.
- Player 1 does exercises on the ladder
- At the end of the ladder is a ball
- With the ball he dribbles along pylons that are wide spread (conditioning)
- At the last pylon he shoots at a small goal
- Get your own ball, shoot back to the end of the ladder
- If player 1 is at the end of the ladder, player 2 can begin
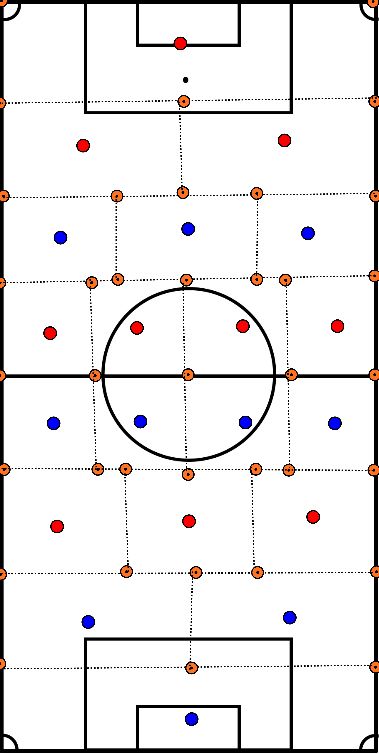
- The idea is to be able to play a game in corona time.
- The idea comes from a table soccer game
- Each player has his own space they are not allowed to leave.
- By passing, the ball can be brought to the other player
- Defense is allowed as long as it remains in his/her own discipline.
- The field can be adjusted to the number of players
Further goals:
- Passing
- Positioning game
- Shooting Distance
- The exercise can be made more difficult by making the game faster
- By only hitting the ball 2 or 3 times and playing quickly
- After all, during a match you don't have that much time either
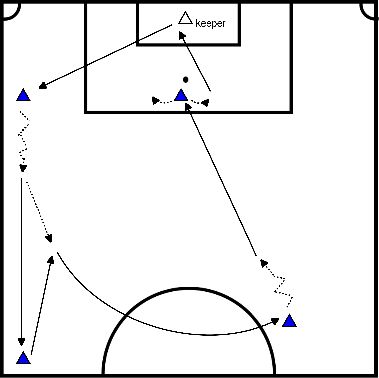
- Pass and kick with variations in finishing and build-up
- Keeper throws out, striker gets the ball and closes in
- Keeper shoots out, playing striker with back to goal, striker turns away
- All players jog in over the field (square)
- Half the number of players has a ball
- players with ball pass the ball to a player without ball (eye contact).
- The players are not allowed to keep the ball with them for longer than 5 sec.
- At the moment the trainer whistles (signal), all players without a ball sprint as fast as possible to the closest player who has a ball and try to take it away.
- The player who has the ball should try to fence it off. (1:1 duel)
- When the trainer blows the whistle again we switch back to jogging and passing!
Nice variant is when you have an odd number of players, the player who can't find a direct opponent gets a command (for example sprint over the width of the field).
- You can use this exercise if you want to work in positions with a defensive triangle.
- You can apply variations where necessary and also change the distances.
- This exercise has been given several times with youth teams as well as with the first teams.
- As you can see in the picture we work on 2 sides.
- Approximately the space from the 16m to the center line.
- First player plays the ball diagonally, player B turns with the ball and plays it to C who performs a 1/2 with B. C plays the ball deep on D. It connects to the other group.
- When A is past the zone the other group leaves.
- Passing on A-B-C-D.
- You can also replace player D by a goalkeeper.
- You can do enough variations in this warm-up exercise. An extra 1/2 for player D. Or player B who moves on the pass of C and responds to D. And so on.
- Let the exercise run for about 4 minutes before inserting a variation.
- Always emphasize the forward rotation of B.
- Take care of a short passing and a short acceleration after the pass at the end of the warming up.
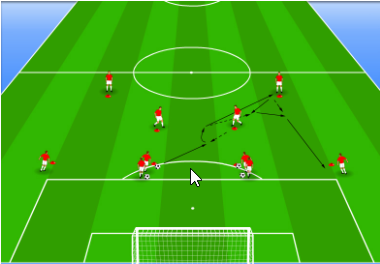
- The players line up in a circle,
- Ideal is 6 to 8 players per circle.
- Per circle you only have one ball.
EXECUTION:
- A player plays the ball to another player, chasing the ball towards the player he is playing.
- The second player receives the ball and plays it back to another player in the circle,
- He, too, will chase the ball towards the player he has just played in.
- This keeps repeating itself.
QUALITY:
- Passes must be clear and accurate.
- The passes are played over the ground, keep the ball low!
- Just after the pass the players accelerate (short sprint)
- Players call the name of the player they want to play in
- All players constantly stand on their toes, not on flat feet, to improve the speed of action.
PROGRESS:
- You can make the game more difficult by hitting once.
- You can play with two balls
- Player 1, who has given the pass, should try to tap the player who has played the pass (player 2) before playing the ball to player 3, etc.
Exercise1 RUN STRAIGHT FORWARD
- Jog to the last pylon.
- Make sure your upper body is upright.
- Your hips, knees and feet should form a line.
- Don't let your knees buckle inwards.
- On the way back, run a little faster.
- Do the exercise twice.
Exercise 2 RAISE KNEE AND TURN UPPER LEG OUTWARDS WHILE RUNNING
- Jog to the first pylon.
- Stop and raise your knee forward.
- Turn your knee out and put your foot down.
- Keep your pelvis horizontal and your upper body still.
- The hip, knee and foot of the supporting leg together form a straight line.
- Do not let the knee of the supporting leg bend inwards.
- Jog to the next pylon and repeat the exercise with the other leg.
- When you have finished the course, jog back. Do the exercise twice.
Exercise 3 RAISE KNEE AND TURN UPPER LEG INWARDS WHILE RUNNING
- Jog to the first pylon.
- Stop and raise your knee sideways.
- Turn your knee inwards and put your foot down.
- Keep your pelvis horizontal and your upper body still.
- The hip, knee and foot of the supporting leg together form a straight line.
- Do not let the knee of the supporting leg bend inwards.
- Jog to the next pylon and repeat the exercise with the other leg.
- When you have finished the course, jog back.
- Do the exercise twice.
Exercise 4 RUNNING AROUND A PARTNER
- Jog to the first pylon.
- Shuffle sideways, at an angle of 90 degrees to your partner, shuffle a whole circle around each other (without changing your direction of view).
- and back to the first pylon.
- Bend your hips and knees slightly and move your body weight to the ball of your feet.
- Do not let your knees bend inwards.
- Jog to the next pylon and repeat the exercise.
- When you have finished the course, jog back.
- Do the exercise twice.
Exercise 5 JUMP AND TOUCH SHOULDERS WHEN RUNNING
- Jog to the first pylon.
- Shuffle sideways, at an angle of 90 degrees to your partner.
- Jump in the middle towards each other to make shoulder to shoulder contact.
- Land on both feet with your hips and knees bent.
- Do not let your knees bend inwards.
- Shuffle back to the first pylon.
- Jog to the next cap and repeat the exercise.
- When you are ready with the course, jog back.
- Do the exercise twice.
Exercise 6 RUN ACCELERATING AND SLOWING DOWN
- Run quickly to the second pylon
- and then run backwards to the first pylon;
- keep your hips and knees slightly bent.
- Always run two pylons forward and one back.
- When you're done with the course, jog back.
- Do the exercise twice.
Set up your team in 2 lines (4-5 per line max) - only 1 ball needed.
IMPLEMENTATION:
- Players take the ball and then play it to the first person in the line opposite to them. Immediately after the pass they draw a sprint and close the back of the line they just played in. This is repeated over and over again.
QUALITY:
- Players are all on their toes ready for the pass.
- Passes are clear and accurate.
- Players must shout if they want the ball to play, and also shout the name to whom they are passing again.
- With the first ball contact they bring the ball under control, the second ball contact is the pass to the other player.
PROGRESS:
- Apply only one pass.
- Let one line pick up the ball and throw it back to the other line. They will then play the ball back with a volleypass and then simply join the other line.
- Let players take the ball with their thigh and bring it under control after which they pass the ball back over the ground.
- Place a pawn 5 meters on either side of the central point between the 2 lines. After the pass, the players have to walk around the pawn after which they connect in the row.


